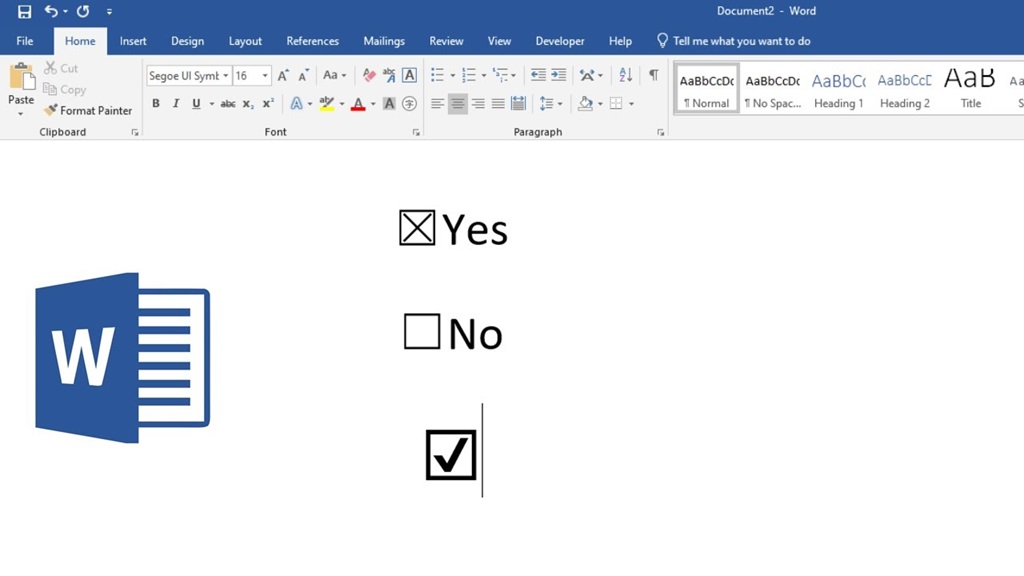
Adding a checkmark (or tick mark) to a document in Word is a quick and easy way to indicate whether a task is complete or agrees with a statement. While Word doesn’t have a direct checkmark Microsoft Word feature, you can easily insert the symbol using your keyboard, the Symbol dialog box, AutoCorrect, or add-ins. The quickest way to add a checkmark is by using keyboard shortcuts.
Hold the Alt key on Windows and type 0252 on the numeric keypad. For Mac, hold Option + Shift and press V. The Symbol dialog box lets you view and insert symbols like the checkmark. Set up an AutoCorrect entry to type a letter combination that instantly inserts a checkmark. Or use add-ins like CheckMark or Checkboxes to access more robust checkmark customization options.
Using Your Keyboard
The quickest way to add a checkmark Microsoft Word is by using keyboard shortcuts. This method works across all Office applications on both Windows and Mac.
On Windows
Hold down the Alt key and type 0252 on the numeric keypad to insert a checkmark symbol on a Windows keyboard. The checkmark will appear once you release the Alt key.
For example:
- Hold down Alt
- Type 0252 on the numeric keypad (not the numbers across the top row)
- Release Alt
The checkmark symbol (✓) will be inserted where your cursor is located.
On Mac
For Mac users, hold down the Option key and Shift, then press the V key.
Here are the steps:
- Hold down Option + Shift
- Press V
- Release the keys
The checkmark (✓) will be added to your document.
This keyboard method is the fastest way to insert a single checkmark. But if you need to add multiple tick marks, using the Symbol dialog box or AutoCorrect may be more accessible.
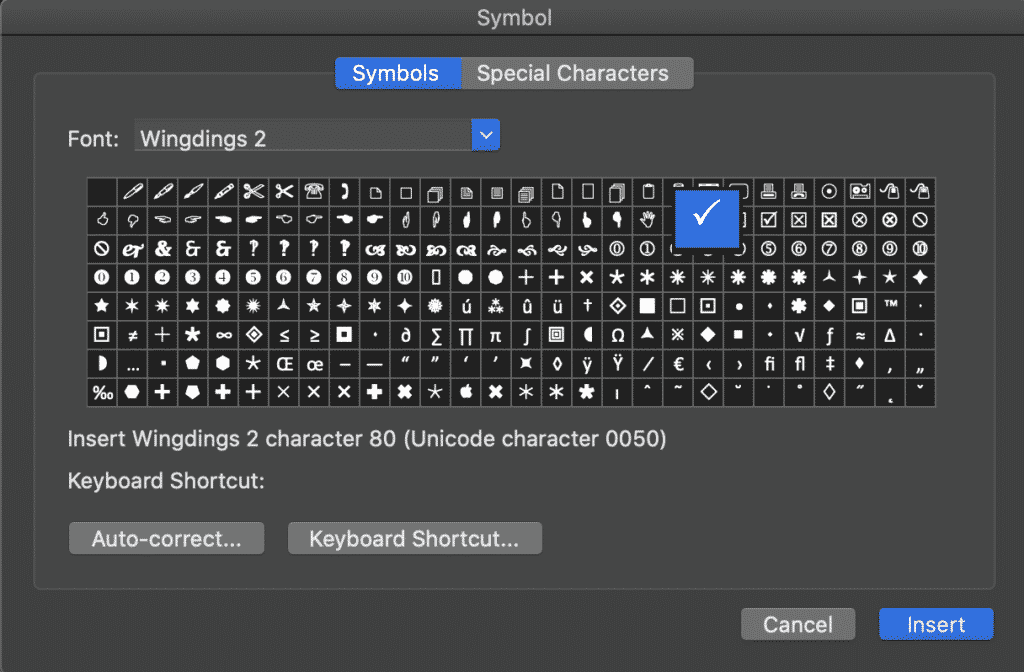
Using the Symbol Dialog Box
The Symbol dialog box lets you view and insert symbols and special characters into your document, including the checkmark.
Here’s how to use it:
- Place your cursor where you want the checkmark to be inserted.
- Go to the Insert tab and click the Symbol icon. Alternatively, press Ctrl+Shift+Q to open the dialog box.
- Select the Font (such as Normal Text).
- Go to the Special Characters section and scroll down until you see the Check Mark symbol.
- Click the checkmark, then select Insert.
- The symbol will appear in your document. Click Close to exit the dialog box.
- Repeat steps 1-6 to add more checkmarks anywhere needed in the document.
While this method only takes a few clicks, it’s slower than keyboard shortcuts if you need multiple checkmarks. But it lets you browse all available symbols and verify you’re inserting the correct one.
Add a Checkmark Using AutoCorrect
If you frequently need checkmarks in your Word documents, save time by setting up an AutoCorrect entry. This will let you instantly type a specific letter combination to insert the symbol.
Here’s how to set it up:
- Go to the File tab and select Options.
- Click Proofing, then select the AutoCorrect Options button.
- Go to the AutoCorrect tab. In the Replace text box, type the letters you want to trigger the checkmark (such as “ch”).
- Enter the checkmark symbol in the With text box (hold down Alt and type 0252 on the numeric keypad).
- Click Add to save the AutoCorrect entry.
- Click OK to close the windows.
Now, whenever you type the letter “ch” in your document, it will be replaced with a checkmark. This saves you from having to insert the symbol manually over and over.
Use a Checkmark Add-In
Add-ins are plugins extending the Microsoft Office’s functionality. Several checkmark add-ins for Word give you more options for inserting and customizing tick marks in your documents.
Some popular choices include:
- CheckMark: This gives you a ribbon button to insert checkmarks and customize the color. It also has keyboard shortcuts and other symbols like crosses.
- Checkboxes: Adds configurable checkbox content controls you can tick on/off, change symbol colors, and more.
- Easy Checks: This lets you make professional-looking checklists with custom fonts, colors, and checkbox sizes.
To use an add-in, first download and install it from the Microsoft Office Store. Then, the new options will appear on your Word ribbon or toolbar. Add-ins enable more checkmark features but are an extra step compared to the basic built-in methods.
Inserting Checkmarks on Smartphones and Tablets
The methods above apply to the desktop version of Word for Windows and Mac. If you need to add checkmarks on the mobile app versions.
Here are some options:
- iOS app: Hold your finger on the screen to trigger the magnifying glass symbol. Slide to Symbols and tap the checkmark to insert it.
- Android app: Tap the … symbol and select Symbols. Scroll and tap the checkmark icon to insert.
- Windows app: Tap the Draw tab, then tap the Pen icon. Select the checkmark symbol in the list to insert it.
While slightly different flows, the mobile Word apps make it just as easy to insert checkmarks on phones and tablets. The Symbol menu is your go-to for finding and adding tick marks.
Checkmark Uses and Examples
Once you know how to insert checkmarks in Word, here are some examples of how they can be used:
To-Do Lists and Checklists
Add checkmarks next to completed tasks or items:
- ✓ Schedule a doctor’s appointment
- ✓ Pay electric bill
- Buy groceries
- ✓ Take the car for an oil change
Checkmarks allow you to scan a list and see remaining to-dos quickly.
Questionnaires and Quizzes
Indicate correct answers on tests and forms:
Which city is the capital of France?
- Marseille
- ✓ Paris
- Lyon
- Toulouse
Tick marks provide clear visual feedback on the right and wrong quiz responses.
Feedback and Edits
Mark up corrections on documents and drafts:
The ✓quick brown fox jumped over the lazy dog✓✓ dog that was sleeping.
Checkmarks let reviewers efficiently provide feedback and approval.
Ballots and Polls
Allow participants to “vote” on options:
Should we go to the beach or park on Saturday?
Beach ✓✓✓ Park ✓✓
Checkmark ballots provide a simple way to poll groups and tally responses.
Agreements and Verification
Show consent to policies, terms, and documents:
I agree to the ✓terms and conditions and ✓privacy policy.
Checkmarks help illustrate consent and affirmation.
Customizing Your Checkmarks
Don’t you like the standard black checkmark design?
Word provides a few options to customize the symbol’s appearance:
- Change color: Select the inserted checkmark, go to Font Color on the Home tab, and pick a color.
- Change font: Select the checkmark, go to Font on the Home tab, and choose a different font, like Wingdings or Webdings, with varied symbol designs.
- Resize: Select the checkmark, go to Font Size on the Home tab, and set a larger or smaller point size.
- Rotate: Select the checkmark, go to the Format tab, select Text Rotation, and choose a rotation like Rotate all text 90°.
- Add text: Type text before or after the checkmark, like “Yes – ✓” or “✓ – Completed.”
Don’t go overboard with different colors, fonts, and sizes, though; too much variation could reduce readability. Subtle changes help customize checkmarks to your needs.
Troubleshooting Checkmark Inserting Issues
Checkmarks are simple to insert, but occasionally, things can go wrong.
Here are some common issues and fixes:
- The keyboard method doesn’t work: Make sure you use the numeric keypad, not the numbers along the top row. Activate Num Lock if needed.
- I can’t find the symbol in the dialog box: The checkmark might be under a different font set. Switch the Font dropdown to find it.
- AutoCorrect isn’t triggering: Ensure you typed the defined Replace text precisely as set up. The AutoCorrect entry may have also been accidentally deleted.
- The symbol appears as a question mark: You don’t have a font installed that supports the checkmark character. Switch to a standard Windows font like Arial or Times New Roman.
- Checkmark inserts as text, not symbol: Your text cursor was not in a location where symbols can be inserted, like a text box. Move the cursor to the main document body.
- A checkmark appears with odd formatting: Clear any manual character formatting applied to the checkmark symbol.
If all else fails, delete the checkmark and try inserting it again using a different method. It would be best always to have a backup option with various ways to add checkmarks in Word.
Conclusion
Inserting a checkmark Microsoft Word is fast and straightforward using keyboard shortcuts, the Symbol dialog box, AutoCorrect, or special checkmark add-ins. With various options, you can add checkmarks anywhere they are needed – like to-do lists, quizzes, documents, forms, and more. Customize them with colors, fonts, and other formatting. If you have issues, there are troubleshooting tips to help get checkmarks inserted properly. With the ability to quickly insert tick marks in Word, you can create checklists, provide feedback, poll groups, and illustrate verification in your documents.
Frequently Asked Questions
How do I quickly insert multiple checkmarks?
Set up an AutoCorrect entry like “ch” for checkmarks to quickly add ticks by typing the defined letters. You can also copy/paste a checkmark repeatedly.
Can I make a checkmark bold, underlined, or italicized?
Select the inserted checkmark and use the Font options on the Home tab to bold, underline, or italicize it like regular text.
Is there a way to make checkmarks automatically appear in checkboxes?
Yes, add-ins like Checkboxes for Word allow you to insert custom, automated checkmark checkboxes that you can tick on/off.
How do I make a checklist with checkmark bullets in Word?
Go to the Home tab, click the Bullets button, and select a bullet style with a checkmark symbol. This will create a checklist.
Can I change the color of checkmarks in a Word table?
Yes, insert the checkmarks into table cells, select them, go to the Home tab, and pick a Font Color to change the checkmark symbols.
Tags: alt code checkmark, checkmark, checkmark emoji, checkmark symbol, checkmark text, checkmark unicode, green checkmark


Leave a Reply